Overcoming Declutter Paralysis in 3 Easy Steps!

You look at a space and can’t even bring yourself to start decluttering it. Declutter Paralysis has kicked in and you don’t know what to do.

You know you need to declutter this space. It’s stressing you out. But you just can’t. You don’t know where or even how to start. Even if you did know, it’s just so overwhelming that you can’t bring yourself to start on it.

I’ve been there before. It’s tough to bring yourself to get past decluttering paralysis, but once you do, things start to get easier. But first you’ve got to get over that hurdle and that’s where I come in.

What is Declutter Paralysis?

Before we get started in trying to overcome Declutter Paralysis, we have to understand what it is. Declutter Paralysis is when you get so overwhelmed by decluttering that you can’t bring yourself to start decluttering.

This can often happen if you’re already stressed out and you’ve got a space that is very cluttered and disorganized. It can also happen if the space is very large or the task is monumental.

My goal is to provide you some easy steps to overcoming declutter paralysis and help you achieve your goals of a decluttered space.

Step 1: Redefine Your Decluttered Vision

Declutter Paralysis is largely a mental state. Half of getting past declutter paralysis is removing that mental block that is preventing you from starting.

I’ve had to clean up some gnarly spaces. The mental thought going through my head that was a little voice saying “I don’t want to do this. I know I have to do this, but this is going to suck. So nope, I’m not going to do this.” This can be an extremely difficult voice to ignore.

One thing I chose to do is redefine what my vision of the decluttered space looked like. So many people get caught on “picture perfection”. Don’t guilt yourself into thinking that you have to have this picture perfect home.

Houses are to be lived in and you are just setting yourself up for failure to try and make it picture perfect all the time. So eliminate that thought right away. You can make it better, but striving for perfect will just set you back where you started.

Step 2: Make it More Manageable

I hear you groaning right now. “Yeah, if it was more manageable, I’d do it already.” Part of declutter paralysis is that most people don’t know how to make the task more manageable. It’s more difficult than it sounds.

Take a look at the space that needs to be decluttered. Start by remembering, you don’t have to do this all at once. Even if you’ve only got a weekend or a day to do it, you don’t have to do it all at once.

Break it Down into Sections

If it’s a big area you are trying to declutter, like an entire room, break it down into sections. It doesn’t matter how many sections you break it down into, just break it down into something that is manageable to you. 

I remember decluttering what is now the kid’s playroom. I needed to have it decluttered and organized by the end of the day because we had guests coming over that night and I’d been working a lot. I’d taken the day off to declutter it.

Declutter paralysis had set in hard. I did not want to tackle that room and it had just gotten worse month after month.

It was a mess. Boxes everywhere from moving. It was the catch-all storage area for everything for years. I ended up breaking it down into 12 different areas to make it more manageable because it was so overwhelming.

Those areas ranged from a single shelf on the book case which was just loaded with stuff to a 10 square foot corner piled high with boxes.

By breaking it down it changed the mindset from “I have to do all this work! It’s never going to get done, I don’t even want to start.” To “I can get this shelf done in the next 30 minutes, it’s small and manageable.” or “I can get this box done in the next 15 minutes and then take a 5-10 minute break.” Once you’ve gotten into this new mindset, you’ve made huge progress in overcoming your declutter paralysis.

When I was decluttering my old home, There were seriously days when all I could bring myself to accomplish was one 2 foot long shelf on a bookcase.

But if that was all I could bring myself to accomplish that day without getting overwhelmed, so be it. I made progress!  As a bonus, once it was decluttered, it remained decluttered. 

Step 3: The Multi-Pass Method

Once it’s broken down into sections, I go through each section on different passes. These different passes are just different levels of effort required to declutter.

First Pass: Low Effort

The first pass is doing the lowest effort work first. The things you don’t have to think about. Start by just eliminating anything that is just garbage. Garbage has no use, no sentimental value, it’s easy to get rid of.

So just bring your trash and recycle bin over and anything that fits into that category, just eliminate right off the top. There! It’s gone! You’ve already made progress! It always amazes me how many items when I am decluttering are just garbage. You may not initially think there is any garbage in the spot you are decluttering, but there probably is.

Second Pass: Items that Make you Feel Bad

For the second pass, I get rid of anything that makes me feel bad or upset. If this reminds you of the KonMari method where she asks ‘Does this Spark Joy?’ It’s because it’s a similar concept.

These items I might get rid of are dead plants because I have zero ability to keep plants alive as I always forget to water them, unfinished projects that you are realistically never going to finish, clothes that you dislike, or even expensive items that make you feel guilty for never using them. 

Third Pass: Items You Don’t Care About

On the third pass, these are things that you don’t really care about. They may still be useful, but you really don’t need them anymore. For example, this might be books and movies that you are never going to read or watch again, items that you’ve replaced with something nicer like old phones, worn out food storage containers, or small appliances. All of these are prime candidates for disposal.

Fourth Pass: Send Things Home

On the fourth pass, I start placing things in their proper home. For example, I decluttered a window sill the other day and I realized I had a tape measure there that hadn’t gotten back into its home after I hung up a coat rack because kids cause chaos and I forgot I had left it there.

This was clearly something that I needed and used, but it was causing clutter by not going to its proper place. Just putting things in their proper home can generally clean up a lot of space.

By the time you’ve gone through all four passes, you should have decluttered the whole space. If you are still cluttered in that space, then go through it again.

Tip and Tricks to Deal with Declutter Paralysis

If you’re still dealing with declutter paralysis, there are lots of ways to deal with it. Here are a few of my go-to tricks that help me get through the process easier:

The Container as Limits Method

One of the big mental blocks I dealt with that caused declutter paralysis was that I have a lot more of something than I actually need but the items are still useful. In this case, it’s helpful to use the container method. Make the container the enemy and not your mind.

A quick example is pens. I have a lot of pens. Do I need 100 pens? Probably not. So I put them in a pen holder and it only held 30 pens. So I took out the 70 pens I didn’t like, that never wrote correctly, were out of ink, etc and left only the 30 I liked.

It was still a lot of pens but I didn’t feel bad about getting rid of those 70 pens anymore because the space only allows for 30.

Take Pictures

If you are still having problems overcoming declutter paralysis, take a picture of the space. Then take 5 minutes and declutter whatever you can in that time. Once the 5 minutes is up, leave the space for the day. Clear it from your mind. Then go back to it the next day and declutter for another 5 minutes. Repeat this until your space is decluttered.

There might be days you only declutter 1-2 items, but at the end you will have a decluttered space. If you are feeling overwhelmed on any day, go back and look at that before photo. Compare it to the progress you’ve made. 

Choose Visible Spots to Declutter

If your whole house is cluttered, then choose the spot that is most visible to you. Sure, your closet in the hall might be a mess, but if you spend 4 hours cleaning it out and then you never look at it, you aren’t ever going to feel like you’ve accomplished anything.

But if you declutter that space that you see every day as you walk in the door, you’ll see your accomplishments and this will help to overcome the declutter paralysis. 

Items You Feel Guilty Getting Rid Of

Are you feeling guilty about potentially getting rid of stuff that was gifted to you? Maybe an item was somewhat valuable or it has sentimental value to someone who gave it to you. So you feel bad getting rid of it.

This is your permission to get rid of it. Acknowledge the guilt associated with getting rid of items and understand that you have the right to let go of things that no longer serve you, even if they were gifted or have sentimental value.

Give yourself permission to release the burden of these items. Remember, once they are in your possession, you have the power to decide what stays and what goes. Embrace the freedom that comes with decluttering.

In conclusion, overcoming declutter paralysis is not only achievable but also empowering. By simply taking the first step, whether it’s tackling one small area or setting a timer for just a few minutes, you can break the cycle of feeling overwhelmed. This initial action serves as a catalyst for further progress, helping you regain control over your environment. Remember, the journey to a more organized and peaceful space begins with that first decisive move. Embrace the process, and you will find that clarity and calm are within your reach.

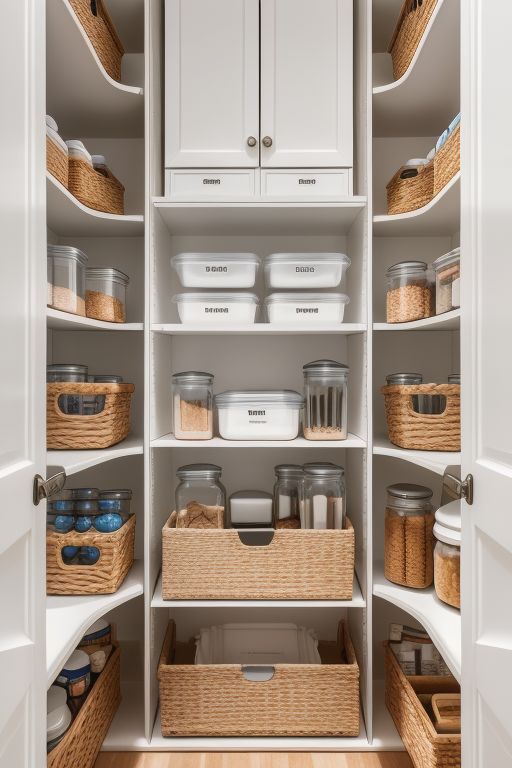
The Containers as Limits Method

The Containers as Limits Method of decluttering has been gaining traction in the last few years. Popularized by Dana K. White, the Container Method also known as the Containers as Limits Decluttering Method is one of my favorite methods for decluttering an area. It’s one I’ve been using since long before I’d ever heard of Dana K. White. In this post we are going to dig into this method and help you understand how it works.

What is the Containers as Limits Method?

The Containers as Limits Method of decluttering centers around the use of physical container to set boundaries within specific spaces or categories. In its simplest form, this method defines the limits of a designated area using containers, and once the container is full, it serves as a visual signal to stop accumulating more items in that space.

Now with the container as limits method, this doesn’t mean that you are necessarily putting things in a physical container, but I’ll get more into that later.  

The container method is made up of 5 core principles. Once you understand these, you can apply the container method to any aspect of your home. The five core principles of the container method are:

1. Setting Clear Boundaries

In essence, this is setting a boundary for your clutter within the containers themselves. As I mentioned earlier, a container doesn’t have to be a physical container like a storage tub, though there are a lot of instances where that might be the case. A container could be a shelf, or a drawer, or a section of a room. By setting clear boundaries, the container method states that once you have filled that container, you cannot put anything else in that space.

2. Assigning Containers to Categories

Each category or type of item should have its designated container. This could be a basket for accessories, a bin for toys, or a shelf for books. The idea is to have a specific place for every type of item, making it easier to maintain order and find things when you need them. Assigning containers to categories ensures that each item has its rightful place within the overall organization scheme.

3. Limiting the Space

The magic happens when you establish the size of the container. The container itself becomes a natural limit on the number of items you can keep within that space. If the container is full, it serves as a clear signal that it’s time to declutter or make decisions about what to keep and what to let go. This limitation encourages mindful choices and prevents unnecessary accumulation.

4. Prioritizing and Evaluating

The Containers as Limits method forces you to prioritize the items that truly matter to you. When faced with a limited space, you’re prompted to evaluate the significance and usefulness of each item. This process of prioritization is essential for cultivating a living environment that aligns with your values and brings you joy.

5. Avoiding Overflow

One of the key principles of this method is to resist the temptation to exceed the container’s capacity. Overflowing containers are visual cues that indicate a need to reassess and declutter. Instead of allowing clutter to build up over time, the Containers as Limits method encourages regular evaluation and maintenance.

Where Can I use the Containers as Limits method?

The great thing about this method is it can be used just about anywhere in your home. I’ve applied this in pretty much every room of my house. Let’s go over a few places that might be the most useful to you!

Kitchen Organization

The kitchen is one of those places that always seems to accumulate clutter. Whether it’s food, paper bags, mail, or kids toys. Everything always seems to land in the kitchen. The nice thing about the kitchen is it tends to have containers built into it in the form of drawers and cupboards.

Let’s take coffee cups for example. Everyone seems to love to give people coffee cups. If you’ve got a shelf in your cupboard and your coffee cups are stacked, you can use the container method to clear it out. Keep only the ones you like or need and then get rid of the rest.

That shelf is the limit of how many coffee cups you can actually keep. Let the size of the shelf be the container that limits your amount of coffee cups. Let the shelf be the enemy. If you have one that you like better than the rest but you don’t have a spot for it, choose which coffee mug you like the least and get rid of it. I’ve done this with glassware, plates, small appliances, food storage, even drawers of random utensils or knives. 

The Pantry

Apply the Containers as Limits method to your pantry by using containers for different food categories. Assign containers for grains, snacks, spices, and canned goods. When a container is full, it’s time to reassess your pantry items and make intentional choices about what to keep and what to use or donate.

Bedroom Closets

The Containers as Limits method works great for closets. I use this method to contain and sort through things like socks and t-shirts. This keeps the amount of each of these items down to a reasonable amount, it keeps things more organized, and makes it easier to see what you have. It also reduces the dreaded “I have nothing to wear” dilemma. 

Home Office and Paper Management

The Home Office is the perfect place to implement the Containers as Limits method. Paper clutter is a common challenge in many households. Using the Containers as Limits method, you can create a system for managing paperwork. Assign containers for bills, important documents, and miscellaneous papers. Personally I use a letter tray organizer with 5 slots.

When a container is full, it’s time to sift through the papers, discard what you no longer need, and organize the rest. This approach not only streamlines your home office but also ensures that important documents are easily accessible.

Children’s Toys and Play Areas

Nothings gets out of hand faster than children’s toys. For us, the children’s play room is a constant mess. The Containers as Limits method has helped a lot with wrangling that mess and reducing the clutter.

We have a bunch of containers to keep things separated out. Some examples of our containers are Stuffed Animals, Crafts, Trucks, and Blocks. We found that separating them out into containers has a few benefits. 

First, the kids know exactly what goes where so cleanup becomes easier. 

Second, there are less things overall to cleanup because the kids tend to not be dumping out all of the stuff as was the issue when everything was in one giant box. It’s so nice not having to pick up the jumbled mess of Potato Head parts, LEGO, Trucks, and blocks because they were all put together in one spot. 

Third, with the container as limits method, we can limit what the kids have access to and they can focus on certain toys rather than being overstimulated and having more toys than they could possibly play with during the day. This allows them to be more creative and imaginative.

Digital Clutter

While this is a bit more abstract to think about, you can absolutely use containers as limits to manage your digital clutter on your computer or smartphone. Create folders for different categories of files and set limits on the amount of data you store. When a digital container is nearing its limit, take the time to declutter and organize your digital files.

Benefits of the Containers as Limits Method

Now that we’ve explored the principles and practical applications of the Containers as Limits method, let’s discuss the benefits of incorporating this approach into your lifestyle. 

Visual Clarity

Visual Clarity is a huge benefit of the Containers as Limits method. As I mentioned earlier with the kids playroom, we used containers to separate various toys into their own spots. So LEGO had their own container, Mr. Potato Head had its own container, Play-Doh had its own container.

The result is that we can just look at the shelf and pull down the contained set of toys we are looking for. This also means when putting things away, the kids can easily identify what goes where.

This also works well for other things in the house. For clothing maybe you put all your socks in one container and plain colored t-shirts in another. In your cupboards you might organize things so all coffee mugs go on one shelf or all of your snacks go in a single container. In all cases, you can easily look and get visual clarity of where things should go.

Mindful Decision Making

Being more mindful about your decision making is a huge part of the Containers as Limits method. By limiting the available space for the various categories of things you own, you are forcing yourself to be more mindful. If you don’t have enough room in the container, you are forced to assess the value and importance of each item. 

For example, lets say you got a brand new coffee mug. As you are putting it in the cupboard, which is the container for it, you realize you don’t have room for it. Using the container method, you have to decide, what coffee mug do you get rid of?

This forces you to be mindful, perhaps this new mug that was just gifted to you isn’t something you want to keep after all and you get rid of it. Or perhaps you might want to get rid of that one mug that never seems to get clean or that you never use. With the containers as limits method, you only keep the stuff you want and never the stuff you don’t care about.

Prevention of Clutter

The Prevention of Clutter is perhaps the biggest reason why I embraced the Containers as Limits method. If everything is contained, it’s a lot harder to have clutter. It also means that instead of waiting and getting overwhelmed by the clutter, as you are adding things you are forced to make a decision about whether or not you want to keep items.

You can do things in the moment. The Containers as Limits method prompts you to consistently maintain and organize the space and helps maintain a more organized environment.

Efficient Use of Space

This is a big one for me, especially in the pantry and with kids toys. With limited space to put things away, trying to keep everything organized when it all comes in a wide manner of shapes and sizes leads to a disorganized mess. 

With the Containers as Limits method, you set the size and shape of the containers instead of the objects you are trying to contain setting the size and shape. I’ll take noodles for example. We all know noodles come in a wide variety of shapes and sizes.

Because we cook from a variety of different cultures, we end up with noodles in boxes, noodles in flimsy bags, noodles in jars, individually packaged noodles. It can be a mess. So, we put each of the noodle types in a new container. A container that fits neatly and efficiently into our pantry. 

This means we always know how much of each type of noodle we have because we can easily look at it, the noodles aren’t strewn throughout the pantry in various spots that ‘Just fit’, and everything is efficiently organized in a way that uses less space.

Keep in mind, you can do this with just about anything, I do this to more efficiently organize things like Play-doh and LEGO or even socks!

Empowerment and Control

Decluttering can be a daunting task, but the Containers as Limits method empowers you to take control of your living spaces. The clear boundaries and visual cues provide a sense of control over your belongings, contributing to a more positive and empowered mindset.

Adaptability to Different Spaces

One of the strengths of this method is its adaptability to various spaces and categories. Whether you’re tackling a small drawer or an entire room, the Containers as Limits approach can be customized to suit your specific decluttering goals.

Overcoming Potential Challenges

I’d be lying if I said there aren’t potential challenges that come with this system. Being aware of them allows you to address them head-on.

Sentimental Items

Sentimental items can be especially hard to let go off. I know because I’ve got stuff I’ve held onto for years for sentimental reasons. Keep in mind, it is perfectly fine to keep sentimental items, but the key is to focus on the joy and purpose that the items bring into your life. If an item no longer serves any purpose in your life or doesn’t bring any joy to your life, consider letting it go. 

Consistent Maintenance

Like all systems, maintaining it takes effort. The Containers as Limits method is no different. You should set aside time to regularly evaluate and declutter the designated containers to ensure that it doesn’t get overwhelming. If you are allowing the method to work as intended though and maintaining as you are hitting the limits of your containers, maintenance should be an easy task.

Initial Time Investment

This is the biggest hurdle most people have to overcome with the Containers as Limits method. Getting started on this method takes time. You have to go through and declutter items and choose what to keep and what to get rid of. This is generally not quick to do. Set aside time to do this. Even if it’s just 15 minutes per day to tackle a section. This will add up quickly and you will make progress. Every little bit of progress helps. The long term benefits will make this time investment worthwhile.

Final Thoughts

I’ve been using this method for years and it changed the way I organize and maintain my home. I don’t have it implemented everywhere, but where I do there is a huge difference in the ease or organization and a reduction of clutter in those areas. 

As long as you are willing to put in the effort to start using this method and get over the initial hurdles of time and decluttering, the long term benefits of this will pay off and your home will be more simplified while still maintaining the feel of a home. This will help reduce time spent on cleaning and reduce your stress and anxiety, giving you time to focus on the more important things in your life.

Quickly Decluttering Your Home Office

If you’re lucky enough to have a home office (or cursed depending on your perspective) then you probably know all too well the pains of when it gets disorganized. The Home Office tends to be a purgatory of bills, schoolwork, random documents, random technology, and a whole myriad of other things that seem to fit into that ‘Home Office’ category. Today we are going to go over the process of decluttering your home office and how to get it organized.

Continue reading “Quickly Decluttering Your Home Office”