Overcoming Declutter Paralysis in 3 Easy Steps!

You look at a space and can’t even bring yourself to start decluttering it. Declutter Paralysis has kicked in and you don’t know what to do.

You know you need to declutter this space. It’s stressing you out. But you just can’t. You don’t know where or even how to start. Even if you did know, it’s just so overwhelming that you can’t bring yourself to start on it.

I’ve been there before. It’s tough to bring yourself to get past decluttering paralysis, but once you do, things start to get easier. But first you’ve got to get over that hurdle and that’s where I come in.

What is Declutter Paralysis?

Before we get started in trying to overcome Declutter Paralysis, we have to understand what it is. Declutter Paralysis is when you get so overwhelmed by decluttering that you can’t bring yourself to start decluttering.

This can often happen if you’re already stressed out and you’ve got a space that is very cluttered and disorganized. It can also happen if the space is very large or the task is monumental.

My goal is to provide you some easy steps to overcoming declutter paralysis and help you achieve your goals of a decluttered space.

Step 1: Redefine Your Decluttered Vision

Declutter Paralysis is largely a mental state. Half of getting past declutter paralysis is removing that mental block that is preventing you from starting.

I’ve had to clean up some gnarly spaces. The mental thought going through my head that was a little voice saying “I don’t want to do this. I know I have to do this, but this is going to suck. So nope, I’m not going to do this.” This can be an extremely difficult voice to ignore.

One thing I chose to do is redefine what my vision of the decluttered space looked like. So many people get caught on “picture perfection”. Don’t guilt yourself into thinking that you have to have this picture perfect home.

Houses are to be lived in and you are just setting yourself up for failure to try and make it picture perfect all the time. So eliminate that thought right away. You can make it better, but striving for perfect will just set you back where you started.

Step 2: Make it More Manageable

I hear you groaning right now. “Yeah, if it was more manageable, I’d do it already.” Part of declutter paralysis is that most people don’t know how to make the task more manageable. It’s more difficult than it sounds.

Take a look at the space that needs to be decluttered. Start by remembering, you don’t have to do this all at once. Even if you’ve only got a weekend or a day to do it, you don’t have to do it all at once.

Break it Down into Sections

If it’s a big area you are trying to declutter, like an entire room, break it down into sections. It doesn’t matter how many sections you break it down into, just break it down into something that is manageable to you. 

I remember decluttering what is now the kid’s playroom. I needed to have it decluttered and organized by the end of the day because we had guests coming over that night and I’d been working a lot. I’d taken the day off to declutter it.

Declutter paralysis had set in hard. I did not want to tackle that room and it had just gotten worse month after month.

It was a mess. Boxes everywhere from moving. It was the catch-all storage area for everything for years. I ended up breaking it down into 12 different areas to make it more manageable because it was so overwhelming.

Those areas ranged from a single shelf on the book case which was just loaded with stuff to a 10 square foot corner piled high with boxes.

By breaking it down it changed the mindset from “I have to do all this work! It’s never going to get done, I don’t even want to start.” To “I can get this shelf done in the next 30 minutes, it’s small and manageable.” or “I can get this box done in the next 15 minutes and then take a 5-10 minute break.” Once you’ve gotten into this new mindset, you’ve made huge progress in overcoming your declutter paralysis.

When I was decluttering my old home, There were seriously days when all I could bring myself to accomplish was one 2 foot long shelf on a bookcase.

But if that was all I could bring myself to accomplish that day without getting overwhelmed, so be it. I made progress!  As a bonus, once it was decluttered, it remained decluttered. 

Step 3: The Multi-Pass Method

Once it’s broken down into sections, I go through each section on different passes. These different passes are just different levels of effort required to declutter.

First Pass: Low Effort

The first pass is doing the lowest effort work first. The things you don’t have to think about. Start by just eliminating anything that is just garbage. Garbage has no use, no sentimental value, it’s easy to get rid of.

So just bring your trash and recycle bin over and anything that fits into that category, just eliminate right off the top. There! It’s gone! You’ve already made progress! It always amazes me how many items when I am decluttering are just garbage. You may not initially think there is any garbage in the spot you are decluttering, but there probably is.

Second Pass: Items that Make you Feel Bad

For the second pass, I get rid of anything that makes me feel bad or upset. If this reminds you of the KonMari method where she asks ‘Does this Spark Joy?’ It’s because it’s a similar concept.

These items I might get rid of are dead plants because I have zero ability to keep plants alive as I always forget to water them, unfinished projects that you are realistically never going to finish, clothes that you dislike, or even expensive items that make you feel guilty for never using them. 

Third Pass: Items You Don’t Care About

On the third pass, these are things that you don’t really care about. They may still be useful, but you really don’t need them anymore. For example, this might be books and movies that you are never going to read or watch again, items that you’ve replaced with something nicer like old phones, worn out food storage containers, or small appliances. All of these are prime candidates for disposal.

Fourth Pass: Send Things Home

On the fourth pass, I start placing things in their proper home. For example, I decluttered a window sill the other day and I realized I had a tape measure there that hadn’t gotten back into its home after I hung up a coat rack because kids cause chaos and I forgot I had left it there.

This was clearly something that I needed and used, but it was causing clutter by not going to its proper place. Just putting things in their proper home can generally clean up a lot of space.

By the time you’ve gone through all four passes, you should have decluttered the whole space. If you are still cluttered in that space, then go through it again.

Tip and Tricks to Deal with Declutter Paralysis

If you’re still dealing with declutter paralysis, there are lots of ways to deal with it. Here are a few of my go-to tricks that help me get through the process easier:

The Container as Limits Method

One of the big mental blocks I dealt with that caused declutter paralysis was that I have a lot more of something than I actually need but the items are still useful. In this case, it’s helpful to use the container method. Make the container the enemy and not your mind.

A quick example is pens. I have a lot of pens. Do I need 100 pens? Probably not. So I put them in a pen holder and it only held 30 pens. So I took out the 70 pens I didn’t like, that never wrote correctly, were out of ink, etc and left only the 30 I liked.

It was still a lot of pens but I didn’t feel bad about getting rid of those 70 pens anymore because the space only allows for 30.

Take Pictures

If you are still having problems overcoming declutter paralysis, take a picture of the space. Then take 5 minutes and declutter whatever you can in that time. Once the 5 minutes is up, leave the space for the day. Clear it from your mind. Then go back to it the next day and declutter for another 5 minutes. Repeat this until your space is decluttered.

There might be days you only declutter 1-2 items, but at the end you will have a decluttered space. If you are feeling overwhelmed on any day, go back and look at that before photo. Compare it to the progress you’ve made. 

Choose Visible Spots to Declutter

If your whole house is cluttered, then choose the spot that is most visible to you. Sure, your closet in the hall might be a mess, but if you spend 4 hours cleaning it out and then you never look at it, you aren’t ever going to feel like you’ve accomplished anything.

But if you declutter that space that you see every day as you walk in the door, you’ll see your accomplishments and this will help to overcome the declutter paralysis. 

Items You Feel Guilty Getting Rid Of

Are you feeling guilty about potentially getting rid of stuff that was gifted to you? Maybe an item was somewhat valuable or it has sentimental value to someone who gave it to you. So you feel bad getting rid of it.

This is your permission to get rid of it. Acknowledge the guilt associated with getting rid of items and understand that you have the right to let go of things that no longer serve you, even if they were gifted or have sentimental value.

Give yourself permission to release the burden of these items. Remember, once they are in your possession, you have the power to decide what stays and what goes. Embrace the freedom that comes with decluttering.

In conclusion, overcoming declutter paralysis is not only achievable but also empowering. By simply taking the first step, whether it’s tackling one small area or setting a timer for just a few minutes, you can break the cycle of feeling overwhelmed. This initial action serves as a catalyst for further progress, helping you regain control over your environment. Remember, the journey to a more organized and peaceful space begins with that first decisive move. Embrace the process, and you will find that clarity and calm are within your reach.

How to Declutter Your Home Part 2

In part of our series on how to declutter, I want to discuss steps 5-8. I touched on them in the the Article How to Declutter Your Home Part 1, but now I want to go more in depth.

As a quick recap of of the first for steps in process of learning how to declutter, you did the following:

  1. You identified where you want to start.
  2. You broke your area down into manageable tasks.
  3. You started decluttering.
  4. You made a list of projects that came from your decluttering.

If you haven’t done those steps yet, go back and read How to Declutter Your Home Part 1. Then go through that process. Once you’ve done that, come back and let’s start on the next steps.

How to Declutter Your Home Steps 5-8

The next 4 steps in decluttering your home are as follows:

  1. Organize.  
  2. Execute your projects you identified.
  3. Reorganize based on the completion of projects
  4. Declutter as maintenance.

Now that we know all the steps, it’s time to work through each one so you can have a truly decluttered home.

Step 5: Organize

The 5th step in the process of learning how to declutter your home is to organize your space. Depending on the size of the area and how much you have leftover after decluttering, this can either be a very quick process or a very long process.

Organization is broken down into a few basic steps:

  1. Sort and categorize your items that you are organizing. While you were decluttering, you probably already started this process. This means that if you’ve got pens, they all go together. If you have cleaning products, those all go together too. Categorize in a way that makes sense.
  2. Identify storage solutions for your space if needed. For example, organizing my bookshelf I didn’t need storage solutions, I just needed to put my books in place in a manner that made sense. For the top shelf of my desk, I just needed to ungroup things so they looked nice. When it came to organizing my closet, I needed storage solutions for the various seasonal decorations, air mattresses, and other things stored there.
  3. Label as needed. Labels are extremely important in organization. Especially if you have storage solutions. These ensure that you always know what is in any given storage container and only the items that belong there, end up in that container.

It’s extremely important when you are learning how to declutter that you figure out an organizational system that works for you. You will want to ensure it is well thought out. Otherwise you will end up with a cluttered mess again.

Step 6: Execute the Projects You Identified

So you identified some more projects to take care of. Now that you’ve decluttered that space you were working on, it’s time to start executing the other projects you wrote down to take care of.

During this phase, you are going to start back at step 3, the decluttering phase. For each of the projects that you identified during your previous decluttering steps, you are going to prioritize and execute them in whichever order makes the most sense.

For example, let’s say when I decluttered my desk, I still had that jar of pens that I needed to go through, a now neatly decluttered stack of papers, and a disorganized storage tub that has a bunch of old computer parts in it.

I would then prioritize each of these items in a way that made the most sense for me. The paper was going to be the most time consuming and least visually impactful. The pens wouldn’t be visually impactful and it would be quick. The storage container was going to be the most visually impactful, but emotionally consuming.

In the end, I chose the storage tub of computer parts and started going through that process to start on. This goes back to my previous statement, when you are trying to figure out how to declutter, there is no right or wrong way.

While I opted for the most visually impactful, you might choose the path of the most time consuming just to get it out of the way. Both are perfectly fine.

Step 7: Reorganize Based on Project Completion

Now that you’ve executed your other projects, you will need to reorganize. This is important because a lot of times when you organize other things, you may find that areas you already decluttered either now look more cluttered because you found things that actually belong there. Or maybe you got rid of things and now it doesn’t look as organized anymore.

In this step of the how to declutter process, you will make sure that you aren’t taking step backwards. By reorganizing, you are ensuring that things stay neat and orderly.

In the process of learning how to declutter, this step tends to be more aesthetic but still important. What good is a decluttered home if it still looks bad?

For example, I decluttered one of my counters and I had project that came out of it to go through a bunch of bottles for when I home brew. At the end of sorting through all of them, all of which did belong on that counter I ended up with everything shoved in a corner. A significantly smaller amount of bottles, but they were still shoved in a corner. So during this reorganization step I made it look nice and fit in with the rest of the aesthetic of the counter.

Step 8: Declutter as Maintenance

Step 8 in the process of learning how to declutter is to declutter as maintenance. Decluttering as maintenance means that you are consistently going back to a space that you decluttered to ensure that it remains decluttered.

Depending on the location, you may want to go back to it monthly, weekly, or even daily to ensure that it remains decluttered.

For example, our kitchen counter where mail from the day frequently lands, I will clean off and declutter daily. We have a table that always seems to collect kids stuff throughout the week. I tend to declutter that weekly. Other places like my closet I declutter every 6 months or so depending on what fits and what is worn out.

As you complete these 4 steps, you will start seeing a change in how cluttered your house is. Keeping your house clutter free will result in less stress and anxiety and ultimately it will help improve your life.

Is Paid ViewPoint A Scam?

Paid ViewPoint is site that claims to give you real money just for taking surveys. But is Paid Viewpoint legitimate or is it a scam?

This is the first article in our Side Gig Series. In this series, I’m going to review sites and apps that claim to give you free or easy money to find out if they legitimate and if they are worth your time so that you don’t have to.

What Is Paid Viewpoint?

So let’s start with the question: What is Paid Viewpoint? Paid ViewPoint is a market research company. They give you access to surveys which they will pay you for your point of view. Hence the name Paid Viewpoint. 

It’s one of many platforms that companies use to gather feedback from potential customers to make decisions about their products, services, and marketing strategies. It’s free to sign up to get started.

On Paid ViewPoint you will get surveys for all sorts of things ranging from new product ideas to getting your opinion on local or national political candidates.

How do I Make Money With Paid ViewPoint?

Like many other market research sites, you make money on Paid Viewpoint from participating in surveys. Any time you get the option for a survey, you have the potential to make at least $0.10. It may not seem like much but it starts to add up. During my first 3 weeks of using it, I made almost $30. 

The Positives of Paid ViewPoint

One of the things I really like about Paid ViewPoint is that no matter what, you always receive at least $0.10 for participating in a survey, even if you get screened out. This is great because on many of the other sites that offer surveys, you can go through tons and tons of screening questions and then get screened out and have nothing to show for it.

Paid ViewPoint also does a good job of keeping track of what things are relevant to you and showing you surveys that you can actually participate in. It does this through what is called the Trait Score. A higher Trait Score means you will get more relevant surveys to you. Generally your Paid ViewPoint Trait Score will increase as you get screened out of surveys. 

Paid ViewPoint also encourages you to invite other people to join. Anybody who joins off of your referral will earn you 20% of whatever they cash out every single time. So if you invite a friend and they cash out at $10, they will get $10 and you will get $2. If they cash out again, you once again get that 20%.

When it comes to surveys, Paid ViewPoint is very flexible when it comes to how long you have to complete a survey. I frequently will start a survey and not be able to complete it for a little bit. I’ve gone up to an hour before going back to a question on a survey and completing it. This means that you don’t get penalized for not completing a survey in one sitting. I find this is especially useful when I am trying to complete a long survey.

You can also get various types of surveys as well. Some of the surveys involve recording videos or taking pictures. If that isn’t your style, you can easily opt out of them.

The Negatives of Paid ViewPoint

PaidViewpoint isn’t without its drawbacks. The biggest one is that there can be several day dry spells where there are no surveys available at all. Last week I went through 4 days before I got a single survey available to me. This is because they try to tailor the surveys to the people who will actually be using the product. 

If you are using the iPad version of the app, it tends to be buggy. Often times I find videos won’t load on my iPad and I’m forced to use my phone to complete the survey. 

The other thing that frustrates me is the fluctuating Cash Out policy. Initially it’s always $15. Then the next time I cashed out, it went down to $10…great! Then I cashed out at $10 and it said I was at $10 for a day then it went back up to $15. Meanwhile my friend’s cash out policy is at $5. Paid ViewPoint does make it very clear what the cash out policy is for you, but it would be nice if it was consistent. 

What Methods Can I Use to Cash Out?

You can cash out via PayPal or via Gift Card. There are quite a few gift card options available including Amazon.com. If you are saving up for something big, I highly recommend PayPal as it has options available for High Yield savings. 

What Platforms Does Paid ViewPoint Support?

You can use Paid ViewPoint on iOS, iPadOS, Android, or your web browser. It’s supported on Chrome, Safari, Firefox, or Opera but not Edge or Internet Explorer.

Is Paid ViewPoint A Scam?

I can confidently say that Paid ViewPoint is not a scam. It’s a legitimate website with real payouts. I have had no issues collecting my money from Paid ViewPoint and if you are looking to earn a little side cash, I highly recommend it!

How Can I Join Paid ViewPoint?

If you join through my referral link, you help keep this site running! Click here to join!

Final Thoughts

While it’s not a perfect application by any means, this is by far the one I use the most often. With the high payouts and the great referral program, I have found that this app is definitely worth my time.

While I don’t like that sometimes you get dry spells where there are no surveys, especially on nights and weekends, overall I’ve found that it is worth your time to do the surveys. The payouts are legitimate and the surveys are easy. Overall I’d give this app an 9 out of 10

Rating: 9 out of 10

How to Declutter Your Home Part 1

Do you need to learn how to declutter your home? Don’t worry, I had to learn too. It’s not as difficult as it seems. Let me tell you a quick story.

Around 3 months into the pandemic, I was starting to feel overwhelmed. I’d already been working from home since 2019 but now I was stuck at home.

I had all this stuff around me and I came to a realization: a major source of my anxiety was clutter. Thus began my decluttering journey.

Let’s be honest here, trying to figure out how to declutter is a daunting task. It seems like a never ending chore. There is some truth to that. That is why it’s so important to remember this mantra:

“Decluttering is not a task, it’s a journey.”

I tell myself this a lot when I start to get overwhelmed with the clutter. Unless you live alone, never have anyone over at your house, and have complete 100% control of anything that comes in and out of your house.

Clutter is going to creep up on you. Even when you live alone, it can still start to take over. All it takes is a few days of being overwhelmed at work and not having time to clean up. You tried making something new and now you’ve got extra supplies in your cupboard that you may never use. Suddenly you’ve got clutter.

Don’t despair. Clutter happens and once you’ve gotten it to a manageable state, it’s easier to get back into that manageable state. If clutter starts to take over again, just remember, it’s a journey. 

How to Declutter in just 4 Steps!

The overall process of decluttering can be broken down into the following major 4 steps:

  1. Identify where you want to start?
  2. Break it down into manageable tasks
  3. Start decluttering
  4. Identify projects that come from the decluttering, but don’t complete them.

Now step 4 may sound counterintuitive. For example, what if I find that I have 50 pens that I’m not sure if they work or not? Wouldn’t I want to go through them all to declutter them?

Yes, but that is a time consuming project that takes away from what you are trying to do. It’s better to put them all in a single home and tackle that later. 

How to Declutter Steps 5-8

Wait! I thought there were only 4 steps! So why do I have steps 5-8 here? These aren’t all directly decluttering steps. If you really want to know how to declutter, you will want to do these steps afterwards.

  1. Organize.  
  2. Execute your projects you identified.
  3. Reorganize based on the completion of projects
  4. Declutter as maintenance.

Now Step 5: Organize may seem like it’s out of order. It’s not. Some of these projects may take you days or months to complete. Do you really want to put the declutter on hold while you wait to complete those?

Step 1: Identify where you want to start

Now that we have covered that there are 8 steps total in our ‘how to declutter journey’, let’s go back to Step 1. Where do we begin with this? Depending on the size of your house, this could be a very tough question. 

I’m blessed or cursed depending on how you look at it to live in a fairly large house. Blessed because it gives plenty of room for my kids to run around, that I have my own space, and things aren’t cramped. The downside of it is that there is a lot more room for ‘stuff’. And boy does it pile up quickly. 

As a general rule, when you are choosing where to declutter you want to choose a place that is visible to you. Sure I could start with the closet under the stairs and get that all organized. But do you know how often I open that closet?

Roughly once a week. I could spend all afternoon decluttering it and cleaning it out and at the end of the day I will pretty much never see the work I did in there.

A bit part of learning how to declutter is mental. So you don’t want to start in an area where it will seem like you didn’t do anything at all. 

So, choose a spot that you see every day. That way when you look at it, you see the work you put into it and are more motivated to keep going instead of decluttering being an endless drag that never seems to accomplish anything.

Why do you want to declutter?

When you are trying to figure this out, take a look around you and try and figure out what do you see everyday that is causing you to want to declutter. Perhaps it’s an endless collection of shoes and coats that pile up by the door. Maybe it’s the dining room table that just always seems to be covered in papers and never actually usable for dinner. 

Narrowing It Down

You may have to take a step back to figure it out. I knew that I had anxiety from the clutter, but I was having problems figuring out what it was that was causing that anxiety that made me want to declutter in the first place.

Was it that my office was a mess? That it was always difficult to find what I was looking for in the kitchen and now suddenly we had ants? Was it the fact that we’d been living in this house for almost 3 years and we still had boxes that had never been unpacked from when we first moved here in the ‘storage room’ or as I called it, the junk room.

As I thought about it, the two logical answers were the kitchen and my office. The kitchen was an obvious choice because the ants were getting out of control and I really really hate ants.

My office was the alternative answer because it was where I spent most of my time during the day and it was where I would likely see the most visible impact of my decluttering process. 

What Can I Act On?

With that narrowed down, I asked myself a new question: What is within my ability to act on? Just looking around the house, I realized there was a lot of things that belonged to my wife.

Especially in the kitchen since when we moved in together she already had a complete kitchen full of pretty nice things, so I got rid of most of my kitchen stuff years ago. If you want to know how to declutter, you have to know the golden rule:

“Don’t get rid of someone else’s stuff unless you have permission.”

Now that’s not saying you can’t move their stuff, it’s just saying don’t get rid of it.

So I decided to start in my home office. This room is mostly my domain with just a small corner that my wife’s desk is in. Also being that I work from home, this was the area of the house that I spend the most time in, so this looked like an ideal candidate to start. So now that I had the room figured out, it was time to begin Step 2.

Step 2: Break It Down

The second part of learning how to declutter is learning how to break down things into more manageable tasks. Depending on what and where you are decluttering, these tasks could be as large as “this quadrant of my garage” to “this shelf in my bathroom”.

My office had three major areas that were cluttered. My desk, my bookshelf, and the closet. Looking at my desk, yes it was cluttered but it didn’t affect my ability to work every day.

I could tell it wasn’t the source of my anxiety in the room. Looking at the closet, it just seemed far too overwhelming to start with. So I decided on the bookshelf.

Just a simple bookshelf with 5 shelves on it. It was kind of a mess. The books weren’t really organized on it, there was random stuff on the shelves. It was visually unappealing.

Especially since this is what people would see if I turned on my camera for work because it was directly behind me. This was an embarrassment and it needed to be fixed.

Rules of Decluttering

Before I began working on this, I made a a few rules for myself. 

Rule #1: It’s OK to keep things.

Especially if you are just starting to figure out how to declutter, the whole process can be very overwhelming. Just remember, this is a journey. Personally, I tend to do a major declutter about once every 6-8 months.

Just because I kept it this time doesn’t mean I will keep it next time. When I was learning how to declutter, I found that often times it was just too difficult emotionally or mentally to figure out if something was worth keeping.

That is perfectly fine. Decluttering is a highly emotional process. Keep that book, that cable, whatever it is. This isn’t the last time you will be decluttering, so it’s OK to keep it.

Rule #2: Get Rid of Anything Broken

Sometimes things are just not worth fixing. If that is the case, just get rid of it. A big part of learning how to declutter is knowing when to let go. This was difficult for me because I grew up in a household where we saved absolutely everything.

I knew I had items in the house that would cost more to repair than replace them. For example, I have some battery powered lights that are part of holiday decorations. A new battery was going to cost $5 for them. Not bad right? Until I realized I could replace the entire light for $1.

Sometimes there are items that actually wouldn’t cost too much to repair. In those cases, you have to be brutally honest with yourself. Are you really going to fix it? The vacuum that I spent $500 on, yeah I probably would. That kids toy that needs the wiring fixed on it, probably not.

When you are learning how to declutter your home, it’s important to learn the mantra of Elsa. “Let it go!”

Rule #3: Everything Needs A Proper Home

When you are learning the rules of how to declutter, this is the absolute most important rule. Everything needs a proper home. And not just tossing it in a pile somewhere. It needs a legitimate home.

This means that it should go in a place where it makes sense to find that object. If it is just tossed into a junk drawer, that isn’t a proper home. That is procrastinating and forcing you to deal with it later.

Maybe that home is a storage tub, maybe it’s properly displaying something on a shelf or a wall, or putting it in a drawer with similar items. Those are all acceptable.

I’m going to use twist ties for an example because people love twist ties. If you are putting twist ties in a box with other organizational tools then that is acceptable and it counts as a home. If you are just throwing them into a random drawer to get them out of the way, that does not count as a home.

Step 3: Start Decluttering

This is where the action takes place. This is also where most people get overwhelmed. As you learn how to declutter, it’s important to know that there are two major paths that you can take to decluttering a space.

Path 1: Take Everything Out

Your first option is to take everything out of the spot and put it in spot where you can sort through each item one by one and get rid of things you don’t need.

The major benefit of this method is that you see absolutely everything that you have in that single space. The downside is that if you don’t have time to finish decluttering, you are going to be left with a mess until you finish.

Depending on your lifestyle, this may or may not work for you. I am a parent of young children. This means anything left out is subject to be grabbed and walked off with by little fingers. This method works only in spots of the house that are off limits to my kids, which there aren’t very many of.

For that reason alone, I very rarely use this method. Also, in general I find this method more helpful when organizing than decluttering.

Path 2: Leave Everything In Place

Your second option is to leave everything in the space that it’s in, then sort through the items. In this method, you are going to leave the bulk of the items in place and declutter one by one.

I know a lot of people struggle with this method when they are trying to figure out how to declutter a space, because this method makes it harder to see everything that you have in a particular space.

This is especially true when you are working in spaces like pantries or closets. However, the upside of this is that if you have limited time to declutter, you aren’t left with a mess afterwards that causes more stress.

As a parent of young children, I often have to use this method to tackle spaces. Sometimes my decluttering time is limited to 15-30 minutes and taking everything out of a space to declutter it just isn’t feasible. The kids will wake up and then I’ll have to deal with a mess and kids who think everything from a cardboard box to that expensive vase is a toy.

In the end, choose the method that works best for you. Part of learning how to declutter is learning about yourself and how you function. There is no right or wrong way to declutter as long as it gets done.

Step 4: Identify Projects from decluttering

Sometimes when you are decluttering you’ll find other projects that need to be completed. Now it’s very tempting to start in on those right away. Don’t do it! Part of learning how to declutter is learning restraint.

You don’t want to be stuck with a bunch of half finished projects. Then you will be in a cluttered and probably messier spot than you started with. Instead, write down the project so that you don’t forget to tackle it later.

Let’s take pens for example. I have a pen jar with probably 50 pens in it. Going through and making sure each one works is a tedious task. Some of them were good for sure, some of them were specialty use.

But the pens were all contained and I actually had room for more. Going through the task of sorting through all the pens, while it was a necessary task, it didn’t need to be accomplished right at that moment.

Sorting through them would be counterproductive to the decluttering processes. So rather than sorting through them, I added them to my decluttering project list and kept decluttering the spot I had designated to work on. This kept in on my radar but didn’t stop me from completing my task.

Now keep in mind, you’ll be performing Steps 3 and 4 at the same time. Keep working on getting rid of things. Once you’ve gone through all the items in that area, congratulations you are done! You’ve got a decluttered area!

Yes, it’s that easy, but it can still be daunting. Fortunately, if you still need help with learning how to declutter, I am here to help with Part 2!

Part 2 of this series will cover Steps 5-8 that I listed above.

5 Tips to Declutter A Garage

“Go clean up the garage.” Those are five very dreadful words. Everyone hates trying to declutter a garage. For whatever reason, the garage always seems to become a mess.

It becomes a catch-all for everything from random seasonal stuff to unfinished projects to cardboard boxes. Oh so many cardboard boxes. I just look around my neighborhood and see all the cars that are in people’s driveways because they won’t fit in the garage. 

If you are reading this, it’s likely because you are trying to figure out how to declutter a garage. Trying to declutter a garage is unique challenge though because it tends to be an area where the solution tends to be less about decluttering and more about utilizing your space in a better manner.

This is because unlike other rooms in the house, the garage doesn’t tend to have furniture. It’s generally a large empty room that you put cars in. 

As I looked at our garage, I realized almost everything in there belonged in the garage. I’m not going to store power tools in the living room where I’ve got shelves!

The bikes took up a lot of room too. Most everything actually belonged in the garage but it just looked horrible! Now our garage is neat (most of the time) and we can always park our cars in there. So how did I do it?

Steps to Declutter A Garage

Step 1: Take Inventory and do a Primary Purge

The first step to declutter a garage is to take inventory of what you have. Now I don’t mean create a exhaustive physical list, but at least get a good idea of what you have. Power tools, lawn maintenance equipment, car maintenance tools, bikes, outdoor kids toys, the whole 9 yards.

When you are taking inventory, this is a great time to do what I call ‘The Primary Purge’. This means that as I am doing an initial look over of what I’ve got in the garage, if I see broken or useless items or things I never use, I just get rid of them on the spot.

In some cases this means putting things in the garbage, in other cases it meant putting things in a donation bin. You can’t declutter a garage unless you know what you are working with. It’s also a whole lot easier to organize a garage if you have less stuff to work with..

As I was taking inventory and getting rid of things, I realized that largely everything out there belonged out there, but without any proper storage solutions it was a giant mess.

Step 2: Identify Usable Space

The next thing to do when you declutter a garage is to identify how much usable space you have. Usable space was whatever space you have leftover after the garage is utilized for what you want it for.

In my case that was to park my cars, but maybe that is your workout equipment or even a workbench that you use for your hobbies. This is especially important when you’ve got large items that need to go in your garage, as you may need to work around them.

Once I figured out what kind of useable space I had, I went on to the next step.

3: Visualize Your Space

When you declutter a garage, you really need to visualize the space. I put this step in here because it really helped me figure out a plan for how I wanted to utilize my space.

For example, I realized that the way I was using my space was very poor. If I parked the car in closer to the garage door I’d free up a ton of space. From there I started visualizing the various things I had and how I’d want to store them using the space I had. Which lead me to an important thing I wasn’t thinking of previously:

Step 4: Figure Out How to Utilize Space Vertically and Above

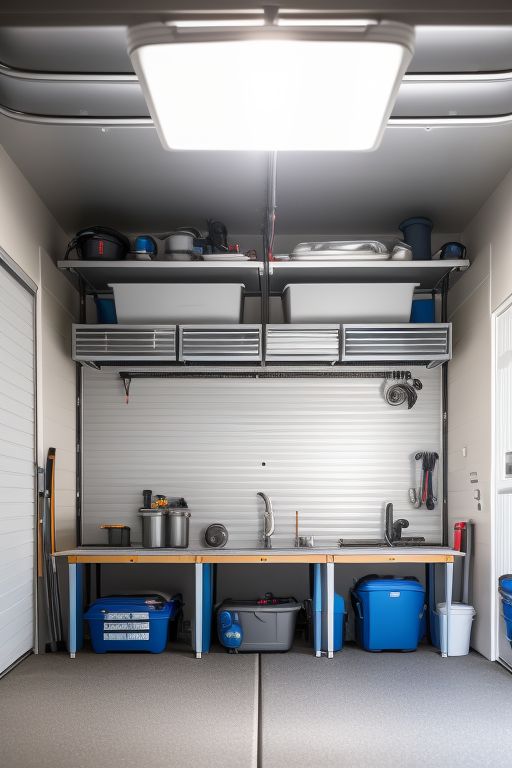
The garage represents a unique space where it’s not necessarily an issue to add in shelving that is hanging from the ceiling. When you declutter a garage, often times the issue is less about having too much stuff and more about not having a good organizational system.

Unlike other places, the garage is not as likely to be a space where you are trying for aesthetics. So this is the perfect place to put hanging storage.

Depending on the height of your garage, you can use this to gain back space that would be otherwise wasted. For example, we keep a chest freezer and a refrigerator in our garage for long term food storage. Due to their size and shape, we could put wall shelving above them.

Enter the ceiling shelves. With those, we were then able to utilize all of that space for storage. It made an ideal spot for all of our holiday decorations and things we really only needed to access once or twice a year.

One thing I will note is don’t put this type of storage above your vehicles. You don’t want to risk anything falling on your vehicles, especially if you don’t properly install them.

For vertical shelving, look at things like pegboards and shelves you can hang on the wall. For example, we found a tire rack that hangs about 8 feet off the ground for our winter snow tires. This works great because it freed up all the space on the ground while looking nice and giving us way more room.

On this same train of thought, we realized we could save room by hanging our bikes on the wall and installing hooks for things like brooms, shovels, rakes, and even our folding chairs.

While it might not be super aesthetically pleasing, we wasted very little space on our walls to ensure that we had maximized our space so that as new and often times temporary items came into the garage we didn’t have to rearrange everything to accommodate.

So for example, right now our kids have PoweWheel trucks. With our upgraded storage we had room for them so we didn’t have to rearrange the garage.

As you are implementing storage onto your walls and ceiling, take a moment and ask yourself if the items you are going to be putting up there are worth the time and effort. Use this as an opportunity to get rid of things that you just don’t want to store.

Step 5: Utilize Standardized Storage Containers

Mismatched storage containers are the bane of my existence and not because they don’t match. When I organized my garage, I picked up a ton of those Black and Yellow Costco Storage tubs. Why?

Because when you have mismatched storage containers, you end up wasting a lot of space. The pile of clear plastic containers that had various tools or Christmas items in them took up far more room than a single Costco Storage tub and held significantly less items. Also when you have to remove them from the shelves, these all stack nicely. 

Even when taking stuff off of shelves it is far more efficient to use standardized containers. The amount of times that I had to dig through a stack of boxes to get to what I was after because it was on the bottom was absurd.

Then the boxes ended up either in a very wobbly stack on the garage floor or spread out across the garage floor to avoid them falling. Then you have to put all of them back! It takes forever!

So, I organized things into the appropriate tubs, labeled them, and then put them all up on the shelves nicely. The result was very little wasted space and a neat and clean looking garage area. 

While you are doing this, this is an ideal time to do a final purge of items. When you declutter a garage, you want to make sure you aren’t putting things back into storage that you don’t want or need.

Key Takeaways to Declutter a Garage

Overall it’s pretty simple to declutter a garage to get it clean and organized. The key items to remember are as follows:

  • Inventory and remove items that don’t belong. 
  • Identify space that could be better utilized and visualize how you want to use it.
  • Install storage on the walls and above or even additional floor shelving if you have room
  • Standardize your storage containers.

Once you’ve gone through this process, your garage should be a neat and orderly place!

6 Expert Tips for Organizing Your Closet

Organizing your closet can be a game changer in your day to day life. It can streamline your daily routine and reduce stress. However, actually organizing your closet is often easier said than done. 

Most people think they have an organized closet but then when they actually go to find things, they realize that lots of items are stuffed haphazardly into shelves and drawers and they can’t actually find anything. This isn’t helpful to your daily routine at all!

I’m going to help you transform your closet with 6 expert tips. These will help you with organizing your closet and transforming it from a mess to a functional and aesthetically pleasing space!

The 6 Steps for Organizing Your Closet

Step 1. Declutter!

Before you start your dive into organizing your closet, it’s absolutely crucial that you declutter your closet first! Otherwise you are just trying to organize clutter and you won’t get anywhere. I go more in depth on decluttering your closet in my other articles, but here are the basics.

You’re going to want to sort your items into 3 categories. Keep, Donate/Sell, and Trash. Everything will go into one of these 3 categories.

When you are doing your sorting, you should be ruthless in your decision making process. You should only keep the items that you love, that you wear frequently, or serve a practical purpose. 

Anything that no longer fits, is damaged beyond repair, or hasn’t been worn in over a year you should discard in either the donation or the trash.

By decluttering your closet, you are clearing up valuable space and also laying a foundation for organizing your closet in an effective manner.

Step 2. Utilize Vertical Space

If you aren’t utilizing your space effectively, then you will struggle to organize your closet effectively. I’ve had walk-in closets and I’ve had tiny closets that quite frankly I don’t know how I managed to put anything in there. 

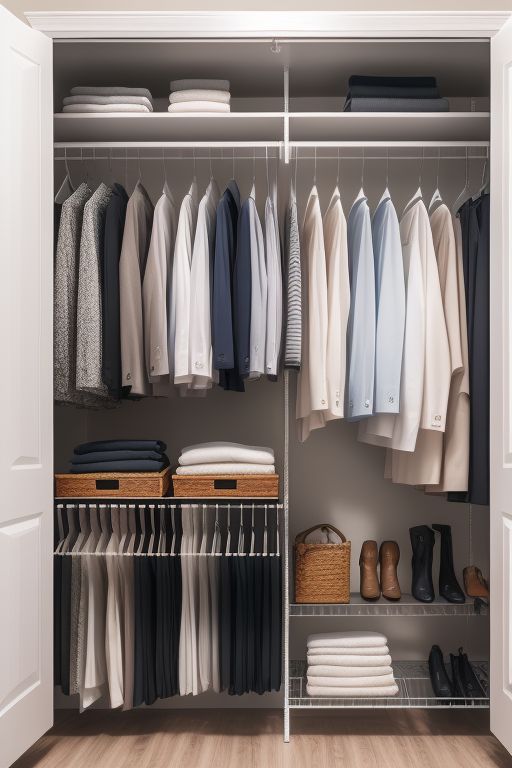
When it comes to organizing your closet, you need to maximize the space you have effectively. That means using that vertical space. Don’t be afraid to install shelves or cubbies above your hanging rods to store folded items like sweaters, jeans, handbags, or even hats.

You can also consider adding hooks or pegs to the walls or the back of your closet door to hang scarves, belts, shoes, or other accessories. 

By making use of that vertical space, you can create additional storage space to organize your closet without overcrowding the rest of your closet space and making it look messy.

Step 3. Invest in Quality Hangers

OK, this one sounds silly, but this makes a huge difference. I always thought a hanger is a hanger right? So I just reused the ones I got from various shirts I bought over the years. You know, the cheap plastic ones that come with shirts you buy at Walmart.

Then my wife handed me some high quality hangers and oh man, it made a huge difference in maintaining the closet.

Slim, non-slip hangers help to maximize the hanging space in your closet. It also prevents your clothing from slipping off the hanger while ensuring that it hangs correctly rather than looking misshapen. 

Additionally, having the same type of hangers helps keep a cohesive look in your closet, making it look visually more appealing while making it easier to organize clothing by type or color. 

If you really want to get fancy, you can even invest in different colors of hangers for different seasons or different types of clothing.

One important thing to do is invest in specialty hangers for items like pants, skirts, or other delicate garments. This will help them maintain their shape and appearance.

Step 4. Organize by Category

When you organizing your closet, make sure you organize by category. You’d be amazed at how many people don’t do this. When you organize your closet by category, you make it easier to locate items and plan outfits.

You should organize your clothing into categories such as tops, bottoms, dresses, outerwear, and special occasion attire. Within each category, further organize your your items by color or season to create a visually appealing display.

Make use of labeled bins or baskets for corralling smaller items like socks, underwear, or accessories. 

By adopting a systematic approach to organizing your closet, you and simplify the process and help maintain order over time. 

I know it sounds like a lot of work to do, but it isn’t. When I fold my laundry, I just sort it on the spot and then put it away in its proper home. While it seems daunting, in practice it really takes no time at all.

Step 5. Implement Storage Solutions

Storage solutions can make a huge difference when organizing your closet. In many cases, a one size fits all solution does not work. By implementing specific storage solutions to fit your individual needs, you can improve the aesthetics and efficiency of your closet space.

Utilize drawer dividers or organizers to separate and contain smaller items like socks, underwear, or jewelry. Shoe racks or shelving units can be used to keep shoes neatly organized and accessible. Garment bags can be utilized to keep whole outfits together.

Also, keep in mind that you don’t always have to store everything in your closet. Under the bed storage containers can be great for off-season or rarely worn items and can free up valuable closet space.

You can also implement custom storage solutions that can be tailored to fit your space. By customizing the solutions to fit your closets dimensions and layout, you can ensure that your space is utilized effectively. 

Step 6. Maintain Regular Maintenance

Maintaining closet organization requires and ongoing effort and commitment. Set aside time on a regular basis to assess your closet’s contents, purge items as needed, and reorganize as your wardrobe evolves. 

Adopt a “one in, one out” policy for new clothing purchases to prevent clutter from accumulating over time. 

Remember, when organizing your closet, just because you start with an organizational system you don’t have to keep it. Make adjustments to your organization system as necessary to accommodate changes in your lifestyle or seasonal wardrobe rotation.

By incorporating regular maintenance into your routine, you can ensure that your closet remains organized and functional for the long term.

Final Thoughts 

Transforming your closet from a chaotic space to an organized oasis is within reach with these expert tips. By decluttering, maximizing vertical space, investing in quality hangers, organizing by category, implementing storage solutions, and maintaining regular maintenance, you can create a closet that not only looks great but also makes getting dressed a breeze. Take the first step towards closet organization today and reap the benefits of a well-organized wardrobe for years to come.

A Digital Minimalists Guide to Technology

One of the main reasons I started this website is because I wanted to show you that it was possible to become a digital minimalist and still use technology to enhance your life.

I’m a heavy technology user. Being in IT and the fact that I run a website means that just saying no to all technology is a nonstarter. However, that doesn’t mean that I have to let technology dictate my life.

Digital minimalists are smart about how they use technology and they control the technology rather than the other way around.

Digital Minimalists and Social Media

Social Media is probably the biggest obstacle to most people trying to become digital minimalists. Social Media has a place in our society and unfortunately it tends to be more or less embedded in ways that you can’t escape.

While it is possible to survive without Social Media, there are certain benefits to it that you lose by removing yourself from it. Now I am not against Social Media. I use it myself for various things. However, it’s important for digital minimalists to evaluate their relationship with Social Media and how it is interwoven into their day to day lives. I’m going to go over some suggestions for each of the major platforms:

Facebook

Facebook has unfortunately embedded itself deep into our society. I dislike Facebook but still end up using it because it offers functions that I can’t get anywhere else.

First and foremost, the Marketplace is better than any of the alternatives where I live. Second, things like Buy-Nothing groups seem to only exist on Facebook in my local area.

As a digital minimalist, I recommend assessing what do you actually use Facebook for. Do you really need it to keep up with your family and friends or can that be better done by a phone call or a text message?

I recommend taking the following actions:

  • Remove any friends that you really don’t care about keeping in contact with. Do you really care about that guy you went to high school with 20 years ago?
  • Unsubscribe and unfollow any groups or things you’ve ‘Liked’ over the years that don’t provide value. For example, I unsubscribed from various news sites that I followed on Facebook and other things that I thought were cool or interesting at the time.
  • If you have friends who post things that are controversial, mostly politics or religion, hide their posts so you can’t see them. This makes it so that you can still go to their page if you want to view what they are saying, but you are less likely to get sucked in and involved in a probably non-productive back and forth conversation with someone in their comments section.

Instagram

Depending on your day to day activities, you may be able to get rid of this. Largely Instagram is a time sink, but it absolutely can provide value. I find a lot of restaurants and small businesses will communicate to their customers through Instagram. This makes it very difficult even for a digital minimalist, to get rid of it. As such, I recommend the following actions:

  • Unfollow anyone you don’t interact with on a continual basis. Keep your list down to a minimum.
  • Unfollow anyone who posts controversial items that may show up in your feed.
  • Only browse instagram with your sound turned off.
  • Choose to sort your list from Newest to Oldest.
  • Turn on ‘Snooze suggested posts from feed’. Unfortunately you have to do this every 30 days, but it keeps random stuff from popping up on your Instagram feed.

Twitter (X)

Twitter, otherwise known as X has become increasingly toxic and useless. Where it used to be a great source of breaking information, changes made to the platform have made it far less useful. As such, a digital minimalist is unlikely to get any value from this platform and I highly recommend deleting it.

SnapChat

This social platform is completely useless. It provides no value and should be deleted. It’s one and only purpose is to try and retain users on its platform.

TikTok

While this platform can contain useful information, the amount of time that you have to spend to get the algorithm to show you exactly what is useful to you is way beyond anything you should do as a digital minimalist. By design they try to keep you on the platform as long as possible. I recommend deleting it.

Reddit

I have a love hate relationship with Reddit. Of all the social media sites, this is the one I spend the most time on and have never been able to break with. Mostly because by the nature of the platform, it contains a ton of useful information. Even as a digital minimalist, this one is hard to break because one of my favorite subreddits is /r/digitalminimalism. I recommend the following:

  • Unsubscribe from any controversial subreddits like /r/politics. This will reduce the chances of you getting into an emotionally charged conversation with someone that keeps you coming back to the platform.
  • Reduce your subreddits to only specific things that are important to you. I only subscribe to 11 subreddits now and it’s all items that are important to my day to day life.
  • Only browse through the Web. Delete the app. This makes it so that you can’t just open the app and doom scroll.
  • Don’t save your password on the site. Force yourself to type it in every single time you want to view Reddit. This makes you think twice before logging in.

LinkedIn

If you are wasting a ton of time on LinkedIn, well I don’t know how. LinkedIn is great for professionals. I keep mine up to date because you never know when the job market is going to turn or who might reach out to you. Keep this and keep it up to date. LinkedIn is boring and that is how it is meant to be.

Digital Minimalists and Devices

One of the main things I see with Digital Minimalists is that they either want to dumb down their existing devices, use alternative devices, or just use less of them. All of these are valid things to do. So let’s tackle a few things:

Phones

The phone is generally the number one driver to people wanting to become digital minimalists. It was for me. I realized I spend way too much time on my phone for my own good and I was missing the world around me. And for what? In fact this is such a big driver that I wrote an entire article about it! But here are the cliff notes.

Apps

Be conscientious about what apps you install on your phone. If they are time sinks, get rid of them. You want all of the apps on your phone to serve a purpose. This means, get rid of games. Get rid of social media apps. Only keep apps that allow the phone to serve as a tool.

Layout

Arrange your phone layout in a way to reduce the amount of time that you spend on your screen. I make good use of widgets to keep all of my critical information available at a glance, sometimes even without unlocking my phone! For example, my daily to-do list is on my Lock Screen.

For everything else, I keep my screens on my phone to two. Everything critical is on my Home Screen so I don’t get tempted to go browsing and get sucked into my phone.

Screen Time

Consider using the built in tools for reducing screen time. There are tools you can use to force you to acknowledge that you’ve been on an app for too long. Sometimes that little nagging reminder is all you need to get off your screen.

Replacement

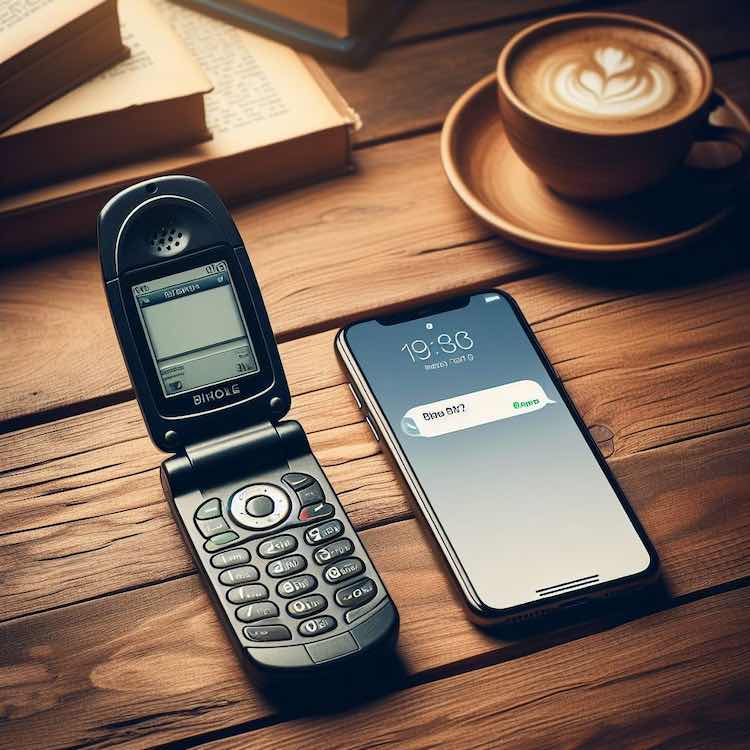
While I’m not a huge fan of this because I find way too much value in my iPhone, I see a lot of digital minimalists replacing their phones with something dumber. If you can get away with only having a flip phone, do it. It will save you money and you are far less likely to be glued to your phone. Or consider switching to a phone that supports far less features. Just remember, there are trade offs to this.

Tablets

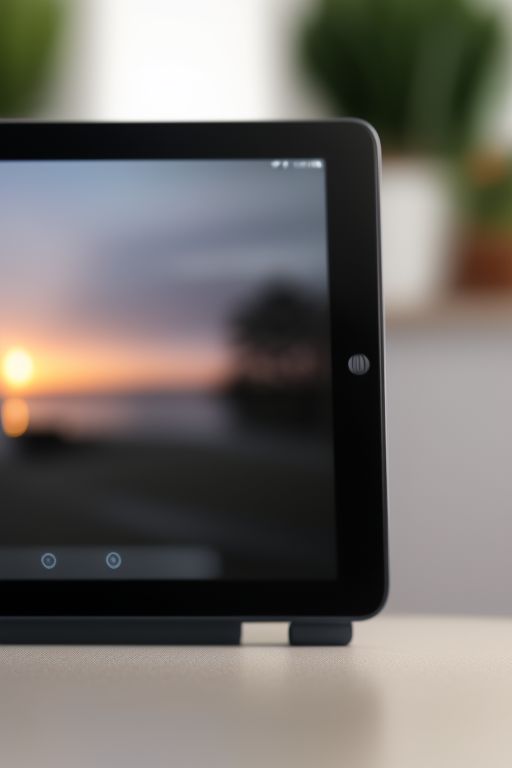
As a digital minimalist, I love my iPad. I use it all the time. Now as we move forward, it’s important to keep in mind that becoming a digital minimalist doesn’t mean getting rid of technology. It means making it work for you. In this regard, the tablet is great for a number of reasons.

First and foremost, I love it because without it I would absolutely never workout. Staring at a blank wall while I’m biking or on the treadmill causes me to look at the time constantly and hate working out. My iPad is great for distracting me so I actually can workout.

Second, I love my iPad for reading books. Yes an eReader would do just as good, but I like to have one device that does everything. I found books were causing too much clutter in our home. So I got rid of most of them and have gone strictly digital.

Finally, I like my iPad because it allows me to separate what I do on devices. I removed most of my distractions from my phone. Including Reddit. So if I want to look at Reddit or do anything with Facebook, I have to go to my iPad. This means that I have to make a conscious decision to go get my iPad rather than just mindlessly scrolling.

Depending on your day to day routines, a tablet may or may not fit into it. But just because you are adopting the digital minimalist lifestyle doesn’t mean you have to get rid of the tablet.

Laptops

Laptops are a tough thing to part with. I still use mine all the time because there is just so much you can’t do with a tablet or a phone. If you can get rid of it, then great, but if you can’t, don’t worry about it.

Most digital minimalists have a laptop do perform day to day functions like paying bills online, looking up information, etc. Use the devices that work best for you!

Final Thoughts

Being a digital minimalist isn’t about getting rid of all your technology. It’s about making the technology work for you rather than you being beholden to the technology. There is so much more we can cover with technology. If there are any topics you’d like to hear more about, just let me know!

What Is Digital Minimalism?

What is Digital Minimalism? As I’ve been trying to bring more focus on Digital Minimalism into my life over the last year, this is a question that has come up a lot.

It’s not an easy answer either because Digital Minimalism much like a the ‘Minimalist Mindset’ varies depending on who you talk to. In this article I’ve boiled it down to the bare bones of what it is so that you can use it as a framework to adopt the Digital Minimalism lifestyle that works best for you.

Before we get into what Digital Minimalism actually is, lets address the elephant in the room. Why are you even here in the first place? The chances are that you realized that you spend way too much time attached to your phone, your tablet, your computer and you realized that it’s not healthy.

That’s how I started down this path in the first place and I think you’ll find that it’s how most people who are involved in the digital minimalist space got involved. Most of what I’ve written is with that theme in mind. With the ultimate goal being to take back the time from the screens and refocus on things that are more important to you in your life.

Let’s Define Digital Minimalism

Let’s start with the official definition of Digital Minimalism, it’s important to know the roots of where this movement started so that you can understand how it has evolved. Digital Minimalism was coined by Cal Newport back in 2016. He defined it as:

“A philosophy of technology use in which you focus your online time on a small number of carefully selected and optimized activities that strongly support things you value, and then happily miss out on everything else.”

Cal wrote a book called Digital Minimalism, it’s a fascinating read. I highly recommend checking it out. You can also check out Cal’s Blog. With the official definition out of the way, we can start to focus on what that actually means to us. 

Digital Minimalism And Technology

Now when most people hear the term Digital Minimalism, they think that it means that Digital Minimalists are against technology. When in fact, there is nothing further from the truth.

I absolutely love technology. I work in IT and techie gadgets and home automation are some of the coolest things in the world to me. If you look at our house, you definitely would not think that Digital Minimalism is even in our vocabulary. 

Digital Minimalism isn’t about ripping out the technology from your life, it’s about making the technology in your life work for you. A good way to look at it is that each application and technology that you use in your life has a value.

Whether that is a positive value or a negative value is what needs to be determined. For the most part, I’m not here to tell you what types of technology are positive or negative values in your life. Your situation is different from mine and what is valuable to me might be completely useless to you.

Once you know the value of a technology in your life, you can make the determination of whether it’s worth it to keep that technology in your life. I’ll go more in depth on this in another article.

At a high level the determination you make will be based on whether or not the technology is providing the positive value its supposed to or if the cons of using it outweigh the positives.

Once you’ve determined what technologies are worth keeping in your life and which ones aren’t, you can focus on optimizing those technologies that provide the most value to get more of your time back in your life. 

This is easy in theory but harder in actual practice. To achieve Digital Minimalism is more than just removing apps from your phone and stopping using certain technologies. It’s about changing the way that you interact with technology. 

This article is just the tip of the iceberg when it comes to Digital Minimalism. If you’re interested in learning more about Digital Minimalism, please check out my other articles on the topic.

How to Declutter Your Kitchen right now

Trying to declutter your kitchen can be a massive undertaking. Depending on the size of your kitchen and what kind of things you have in your kitchen, trying to keep everything in a clean and organized state can seem like an exercise in futility. 

I’ve lived in places with tiny kitchens and large kitchens. They each present their own unique challenges. Fortunately, there are ways to declutter your kitchen and maintain it, even when everything seems hopeless.

Declutter Your Kitchen Counters

This is the thing you are going to see the most when you look at your kitchen. If your countertops are a cluttered mess, this is going to set the tone for the whole kitchen. So when you declutter your kitchen, start with the counters. This is also where you are likely to be preparing food, so maximizing the space and cleanliness here is an absolute necessity.

Dishes

Start simple. Do you have dirty dishes out on the countertop? Put them in the dishwasher or wash them and put them away. If you’ve got clean dishes out on the counter, put them away. Just that little bit of maintenance can make a big dent in your quest to declutter your kitchen. 

Garbage/Trash

Next it’s time to deal with garbage and trash. Perhaps you are lucky and don’t have actual garbage on the counter. However, if your house is like our house, decluttering your kitchen meant getting rid of garbage.

I know it’s not uncommon for us to have trash on the counter. We have young kids and our trash cans are locked behind child-safe locks on cabinets. So when you’ve got kids screaming and you don’t have time, suddenly the garbage ends up on the counter. Do a cursory clean of all those items and throw them away.

Paperwork

For whatever reason people love to keep paperwork in the kitchen. It’s a huge pet peeve of mine. Generally I think it’s because the kitchen tends to be a spot where people land after they get the mail. When you declutter your kitchen, get all the paperwork out of there. It doesn’t belong in the kitchen.

Take a look at the paperwork in your kitchen, if it’s a bill or an actionable item then put it in a spot where you can take action on it outside of the kitchen. If you’ve already got an organizational system in place for paperwork, then use that system for this paperwork.

If not, then take a look at my system for organizing paperwork. For anything that is junk, put it directly in the recycle bin. Get it cleared off the counter. For the purposes of cleaning up paperwork to declutter your kitchen it doesn’t have to be perfect.

Don’t get hung up on setting up an organizational system elsewhere in the house for your paperwork. One job at a time. Just get it out of the kitchen to a spot that is closer to where it belongs.

Small Appliances

Now you’ve gotten the basic maintenance items out of the way. If your kitchen is still cluttered, you may have to look at additional solutions.  It can be helpful to declutter your kitchen appliances.

Look at the appliances on your countertop. Most people have several ranging from microwaves to coffee makers. Are there any appliances up there that you absolutely never use? If so, consider finding new spots for them or getting rid of them.

I know in my old apartment I used the toaster approximately twice over the course of 3 years, but it was occupying precious counter space in my tiny kitchen. So I opted to get rid of it and free up that space.

You may also want to declutter your kitchen appliances that only serve a single purpose. For example, our rice cooker would live on our countertop. So would our InstantPot. Since the InstantPot doubles as a rice cooker, we got rid of the rice cooker and just kept the InstantPot, thus freeing up valuable counter space.

Expensive Items

Now you might be asking, what if an item cost a lot? When you declutter your kitchen, don’t get caught up in the cost of items. If you aren’t using them, then you aren’t getting any value out of them.

Space on your countertop has value and you need to decide if the value of losing the counter space is worth more than the value of the item. Maybe things like a KitchenAid Mixer are worth it, but that toaster isn’t.

At the end of the day, it’s up to you to decide the value of that item in reference to the space it takes up. Remember, you don’t necessarily have to completely get rid of the items off your countertop.

Going back to the KitchenAid Mixer, we don’t use it that often, but it does get used every other month or so. We realized that didn’t warrant the amount of space it took up on our counter. So we found a spot in the cupboard to store it when it wasn’t in use.

Misc Items

If you’re like me, we still had a variety of other items on the countertop that were taking up space. For example, we had coffee pods, chopsticks, fruits, and bread. When you declutter your kitchen and see these things you might think “Wait, these things all belong here!” However, it looked messy and cluttered. So, we introduced the container as limits system.

If you’ve read any of my other articles, you’ll know I’m a big fan of the container as limits system. Which is to say, that you put things in a contained spot and if they don’t fit then you get rid of things until they do. In this way, you are letting the container be the enemy.

For example, we put all of the chopsticks in a coffee cup. After all was said and done, we still had 6 pairs of chopsticks. Because we didn’t have room for those last 6 pairs of chopsticks, we got rid of them. They didn’t fit in the container allotted for them, which meant we had more than we needed.

For the coffee pods we got a little jar that was perfect for holding a box of coffee pods that we got from the store. The pods always end up in that jar as soon as we open the box and they are never spreading across the countertop anymore.

For the fruit and veggies and bread, we put a box on the counter that contains them all. We never buy more than will fit in the box and it keeps them contained and from creeping across the counter.

Keep looking around your counters as you declutter your kitchen. Ask yourself, what else is taking up space and cluttering your counters and what can be contained or gotten rid of?

With young kids, their items take up a lot of room. Especially when they were in the bottle phase. We ended up getting a small set of plastic drawers that fit on the counter easily for all of their bottle items.

With that we were able to contain the mess of all the bottle items that were constantly all over the counter and get them in an organized. When we realized we had too many of something, we got rid off it. 

Once you have containerized and prioritized the items on your countertop, you should have a pretty decluttered and hopefully decently organized countertop. Now it’s time to tackle the cupboards. 

Declutter Your Kitchen Cupboards 

Cupboards are a beast of their own. So often we have items in there that we rarely use but still hold onto for various reasons. Again, let the cupboards be containers and act as the limiter to how much space things can take up.

It makes the cupboards the enemy and not your emotions about whether or not you should keep things. For us the big things that seem to always multiple like rabbits are coffee cups, pint glasses, and storage containers.

Glassware

The way I approached this was to think about how many of each of the coffee cups and pint glasses that was the maximum we’d ever really need.

Figuring in that we are a family of 4 and we’d frequently have 2 guests over, we figured that 6 of each was a good amount. Then we saved our favorite 6 of each one and got rid of the rest. This worked out well because this was approximately how much space we had on the shelf for the glassware. 

Storage Containers

For the storage containers, these I went through and checked to find out which ones didn’t have lids, which ones were cracked, which ones were oddly shaped and never got used, and which ones I knew I hated because they leaked. Anything that met that criteria, I got rid of.

Then I changed my storage method. My goal was no longer to store the maximum amount of things in there, but to store only useful items in there. So rather than stacking them together, I put lids on each container and then stacked them with the lids on.

This also mitigates the unfortunate side effect of if there is just a little bit of moisture anywhere on the glass containers, they will stick together like concrete. 

While this method ultimately took up more room in my cupboard, it’s important to remember that the idea isn’t to fit as many things into the cupboard as possible.

The idea is to declutter it and remove anything that isn’t useful. So by doing this, I forced myself to remove any of the items without lids, the ones I never used, the ones that were chipped, the ones that weren’t microwave safe, etc. 

Pots and Pans

When it came to the other cupboards like pots and pans, I did the same thing. I made sure sets were together, then I stacked them so that I had to analyze whether or not I actually wanted them.

That Wok with the broken handle. Gone! Why do I have these glass pots? I never use them and they are ugly. Gone! I kept using the space of the cupboard as my enemy that decided what stays and what goes and I repeated this through every single cupboard until I had much much less stuff.

Declutter Your Kitchen Drawers

Now in the drawers, I had a lot of single purpose items. Some of them were useful (Like the lemon squeezer) other items like the banana slicer I scratched my head and wondered why we even had that.

For anything that we never used that was a single purpose type of item, I got rid of it to free space for other things. Now one thing to remember, when I say single purpose, I am talking about things that have a purpose that could easily be accomplished by other tools in the kitchen.

Going back to the banana slicer, I could easily accomplish the same task with a butter knife, but a set of measuring spoons is also single purpose but it would be difficult and annoying to use other tools in the kitchen to accomplish what those do. So I kept them.

Final Thoughts

Once you’ve gone through all of this, your kitchen should be a lot less cluttered. You will still need to perform regular maintenance on your kitchen to ensure it doesn’t get cluttered again, but now that you’ve gotten rid of all the extraneous items, you shouldn’t need to declutter your kitchen again.

If you struggle to keep your kitchen clean still, I have some handy steps on how to maintain your kitchen. Remember, it’s always easier to keep your kitchen clean if it contains less clutter.

8 Tips to Organize Your File Cabinet

If you are like me, the thought of having to organize your file cabinet absolutely filled me with dread. Our file cabinet was a mess of disorganized paperwork that was never really sorted through in the first place.

To make it worse it was the combination of two households who had very different and still not very organized filing systems. Basically, the file cabinet is where anything that was ‘this paper looks sort of important’ went to die.

It took a bit of work, but we were eventually able to conquer the file cabinet. Now before you do this, if you have a spouse or significant other who may want a say in how your organize your file cabinet, so make sure that you get them to sign off on it.

This is really important because otherwise you may end up in a situation where they decide they don’t like your new organizational system and it will all fall apart.

And yes, if your file cabinet is really bad, you will need a new organizational system. I’m going to assume that your file cabinet is as bad as mine was and you will need to organize your file cabinet as well as declutter it. If you just need to declutter it because you’ve got all the organization in place, then you are ahead of the game.

Before we go on, I am assuming that you have a file cabinet. However, this system will apply to whatever you use to store your paperwork. For a long time I kept all my items in hanging file boxes rather than a file cabinet because they cheaper and easier to move. Assume I am talking about any place that you store your paperwork when I say ‘organize your file cabinet’.

Items You Need to Organize Your File Cabinet

Before you get started, you will want to get the following items:

  • Hanging file folders
  • Double Pocketed folders
  • A Stapler
  • A Document Scanner
  • A Paper Shredder
  • A USB Thumb Drive
  • A Recycle bin

None of these items are strictly required, but they sure make your life easier. A little up front investment can help a lot as you organize your file cabinet. Each of these items has a very specific purpose in our organizational system.

Hanging Folders and Pocketed Folders

In most cases when you organize your file cabinet, you will need both Hanging Folders and Pocketed Folders. Yes, it may seem redundant to have both, but there is a method to my madness.

At a minimum you will need hanging folders. Keep in mind that I am assuming that you are using a File Cabinet that takes hanging folders. If you are using something like a bankers box for storing your paperwork, pocketed folders may work better for your needs. Use whichever one makes the most sense.

If you live alone, you can probably get away with just the hanging folders or the pocketed folders. However, if you live with other people or have a family, just having hanging folders will cause your organizational system to quickly break down and you will end up having to organize your file cabinet all over again.

So why do I recommend both hanging folders and pocketed folders to organize your file cabinet? It seems redundant doesn’t it?

I found for each person in the family, we will have similar information. For example, my wife and each of my kids has medical records. So I use a hanging folder with the label ‘Medical Records’ on it, then for each member of the family I have an individual pocket folder for all of their medical records.

This means when I have to go look something up for one of my kids, I can just pull out their folder rather than go through everyone’s stuff looking for the file I need.

The Stapler

When you organize your file cabinet, you are going to need a stapler. The use is pretty self explanatory. If you want to ensure that certain documents always remain together, use a stapler.

Not paper clips, a stapler. The 2 seconds of stapling them together can ensure you save a ton of time later trying to piece together multiple pages that got out of order.

The Document Scanner

Get a document scanner to organize your file cabinet. Most people when I tell them this look at me like I’m crazy. The document scanner was a great investment.

While this piece of equipment is optional, the function it serves is not. So I highly recommend it. This was a critical tool for me.

With the document scanner, I was able to scan in documents that I didn’t necessarily need physical copies of but the information would be nice to have in a pinch.

For example, I had some old medical records that maybe would be useful someday, but I didn’t want to hold onto the physical copies. So I scanned them into my computer.

While I recommend a document scanner, if you don’t want to buy one and store it, which I totally understand, your phone has one built in. It’s more time consuming, but it works in a pinch!

If you do choose to buy one, the scanner doesn’t even have to be expensive. I got mine used from a University Surplus Store for cheap and it works great! That’s also where we got our file cabinet because why spend several hundred dollars on one when you can get one that has some scuffs on it for $15?

USB Thumb Drive

You are going to use the USB thumb drive in conjunction with your document scanner. I didn’t really want these documents I scanned in on my computer, so after I scanned them in, I just put them directly on the Thumb Drive and put the Thumb Drive in a safe location.

Document Shredder

The Document Shredder is one of the most essential tools when you organize your file cabinet. You should just have one of these because if you are like me, I am constantly getting mail that could be used for identity theft and for personal identifiable information. This is just good for a peace of mind so that when you dispose of files, they can’t easily be used to have your identity stolen.

Recycle Bin

When you organize your file cabinet, you are going to probably find a lot of stuff that you don’t need. Envelops and advertising that can just go straight into the recycle bin. Make sure you have a bin or bag handy for all of these items.

It’s time to Organize your File Cabinet!

Once you’ve got your supplies, it’s time to start organizing. Now I recommend setting up a staging area for this. I used a card table that I was able to setup in my office for a couple of days because I knew that it wasn’t going to be quick to get though everything.

Then as I pulled things out, I sorted everything into piles. Yours may differ from mine depending on what paperwork you have, but my general piles were as follows:

  • Mortgage/Housing
  • Medical
  • Auto
  • Retirement
  • Household Expenses
  • Taxes
  • Pets
  • Miscellaneous 

When choosing your initial piles, try to keep it very broad. Otherwise you end up with a ton of overwhelming smaller piles of paper. If while sorting through things, you find that you have a lot of a certain category that doesn’t fit neatly into one of these broad categories, create a new pile for it.

As you are sorting through the paperwork, if you find stuff that you don’t need you can dispose of it immediately. This is where the paper shredder comes in handy. If it required shredding, I just shredded it on the spot.

Other items I just tossed directly into the recycle bin. For example, I didn’t really need a receipt for my Internet from 12 years ago when I lived in a different state. Keep in mind if you are getting rid of receipts, most receipt paper cannot be recycled.

The 2 Second Rule

During this initial sort, I made it a point to not spend more than 2 seconds on any piece of paperwork. If I wasn’t sure about it, I just sorted it into what looked like the most correct pile.

By limiting yourself to 2 seconds, you keep yourself moving and you don’t overthink it. Remember, you are trying to organize your file cabinet, not get stuck in sorting paralysis.

Noticing Trends

Be careful with that miscellaneous pile. That one can quickly get out of hand. If while you are sorting you start seeing a lot of a certain type of paperwork going into that miscellaneous pile, you should consider starting a new pile for that type of thing, even if you’ve already sorted out a bunch of those items already. 

While you are doing your initial sorting, try to keep a mental note if you see any kind of trends and categorizations that you may want to separate out later. For example, each of my kids had a lot of medical bills and reports from all the various doctors appointments that you have to go through as infants.

Since each child has differing medical needs and results, I knew I was going to want to split those up into their own folders. Not because I necessarily had a lot of paperwork for them, but I knew that over time they were going to need their own folders. Trust me, your future self will thank you for this.

As a voice of experience, when I was a teenager I had to find some medical paperwork for a trip I was taking. My parents had put the medical paperwork for me and my siblings all in one single folder and it was a struggle to find what I needed.

By separating it out by kid, when I needed some specific information for one of my children last year, I just went to their folder and was easily able to locate it.

Organize Your Categories!

OK, you’ve got all your paperwork sorted out into piles. You now have a table of small stacks of paperwork that is at least sorted into broad categories. Now it’s time to sort through and organize those categories.

Sorting through your individual categories of paperwork and scanning them are going to be the two most time consuming parts of the process when you organize your file cabinet.

Subcategorization

Hopefully you were starting to notice trends in your paperwork when you were doing the initial sort. That will come in handy here. During this subcategorization you will want to sort each stack of papers into smaller piles depending on what it’s related to.

For example, when going through the medical paperwork, I put the medical records for each of my family members into their own piles. For our pets, I split it into two piles. One for each dog that we have. Then all the training, insurance, and medical paperwork went into the corresponding dog’s pile of papers.

I went through every pile of paper doing this. We had 18 years of stuff to go through, so it took several hours to do.

Declutter As You Go

A big part of the process to organize your file cabinet is to get rid of things you don’t need. As you sort through each of these piles, make a decision as to whether or not you really need physical copies of those items.

For example, all of my billing history for things like water, power, etc was available online. I could easily go onto the website for any of my utilities and get that data so there was no reason for me to keep physical copies of any of that paperwork.

It was just causing file cabinet clutter. Other things I found in there were owners manuals for appliances and electronics. All things that are easily found online.

Similarly, I can get bank statements going as far back as I needed from my bank’s website. There was no need to keep any of that paperwork either. Since anything that had personally identifiable information and I didn’t need I shredded. 

Scan what you need

Some of the paperwork I came across and I realized that it may be helpful to have at some point but I really didn’t need the physical paperwork. For example, there was paperwork from the sale of our previous home.

We probably didn’t need it but since this information isn’t easily obtained online I opted to scan this data onto my thumb drive using the document scanner. Once that was done, I was able to shred that paperwork and free up a ton of space in the file cabinet.

Other things that I did similar things to were tax documents. I had over a decade of tax documents. For the record, according to the IRS website, you only need to keep 3 years of tax documents except under special circumstances in which you need to retain 7 years of tax documents. So I kept 3 years, scanned in years 4-7, and shredded the rest. 

Extraneous Paper

While I was doing this second round of sorting, I noticed we had a lot of extraneous paper in with the important items. The number one cause was items in envelopes.

Folded items in envelopes take up more room and are often stuffed with other paperwork you don’t need. If you need to keep the physical paperwork, take it out of the envelopes and dispose of the excess paperwork that comes with it.

Only keep the items that are actually needed. Our insurance provider was notorious for having 2-3 pages in every envelope with ‘terms and conditions’ and ‘this page intentionally left blank’ on it.

Neither of those things are useful to hold onto and you’ll find that it will slim down the amount of stuff in your file cabinet.

When you are pulling this paperwork you want to keep out of the envelopes, if you have multiple pages you should staple them together. As I mentioned earlier, this can save you a lot of time later on.

If you are against staples, use paper clips, but keep in mind those generally take up more room in the file cabinet.

Labeling Folders

One key when you organize your file cabinet is to ensure you have good labels. At this point you should have everything sorted, scanned, and disposed of and you are ready to put thing in their proper home.

Put each of the subcategories into their own pocketed folder. Then put those pocketed folders into a hanging folder. This ensures that like items like medical records are grouped together and easy to find.

I put the broad category I mentioned earlier on each of the hanging folders. So I had a medical folder, I had a retirement folder, I had a pets folder.

For the pocketed folders, I used a naming scheme like this: 

  • Medical – Child 1 
  • Medical – Child 2. 
  • Taxes – My Name – Year. 
  • Taxes – Wife’s Name – Year
  • Taxes – Joint Filing – Year

When all was said and done, I had maybe a quarter of the original amount of items in my file cabinet and everything was much easier to find.

Final Thoughts

When you organize your file cabinet, you are likely to come across a few gotchas. First, forms for mortgages are unreasonably big. To get around this I ended up dedicating an entire drawer to just mortgage information. It’s not efficient, but with all that space freed up it made sense.

Second, when you organize your file cabinet, don’t put things in that don’t belong in there. For example, I found a jewelry box in our file cabinet and some tools. Only put paperwork in there. Everything else belongs in a proper home.

Finally be mindful of what you put in there. Before you file things in there, ask yourself if you really need it. If you do, can you scan it and keep it on the thumb drive? With maintenance, your file cabinet will remain organized.